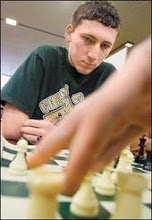
MrMash(2046) - bobadillamitchelle(2045)
1. d4 Nf6 2. c4 d5
Slightly unusual, but perfectly playable.
3. cxd5 Nxd5 4. e4 Nf6 5. Nc3
Much better than the obvious 5. e5?! when the white pawns will be hard to justify once black gets in ...c5.
5. ...e6 6. Nf3 Be7 7. Bd3 h6 8. 0-0 b6!?

An interesting plan. ...b6 prepares the ...c5 break, enables smooth development, and makes white play a little more cautiously. Another alternative was an immediate ...c5 break, but it seems white gets the better of that. Castling is a safer alternative, although ...b6 would likely be played in this system anyway.
9. e5?!
Does not accomplish what I wanted it to. Ideally, there would be an immediate attack on the king after e5, but since it it not castled, there is no such attack. This just leaves both the d4 pawn and d5 square weak.
9. ...Nd5 10. Ne4 Bb7 11. Be3!?
Since it doesn't look like this bishop will get much use in this game, I invite it to be traded for the good knight on d5.
11. ...Nd7 12. a4!?
An interesting plan. I wanted to initiate a queenside attack since my pieces are better developed and centralized.
12. ...Nxe3
A bit hasty, but it is hard to come up with other ideas that are not simply waiting around. Castling seems like a better alternative. On 12. ...f5 I simply go back with Nc3 and the black kingside could prove weak.
13. fxe3 Bb4 14. Qe2

Continuing the queenside plans. Now that d4 has healed itself by the exchange, there are no big weaknesses in the white camp. White has several open files to work with, and should be slightly better here despite the two black bishops.
14. ...Qe7 15. Nc3
Clearing the way for an eventual e4 and d5. An additional, hidden threat is to eliminate the black two bishops.
15. ...a6 16. Na2!
The black bishop will be traded off.
16. ...0-0
...Ba5 Rf(or a)b1 threatens b4 to win the bishop, so it is better to avoid this line and just allow white to capture on b4 with the knight.
17. Rac1
There is no hurry to take the bishop.
17. ...Rfc8 18. Bb1!
Preparing Qd3/c2, which will force a weakness around the black king.
18. ...c5!?
Desperately trying to generate counterplay by opening a file.
19. Qd3
An in-between move, since the threat of mate overrides everything else.
19. ...g6 20. Nxb4 cxb4 21. Nd2

The knight has its sights set on d6 and/or f6.
21. ...Bc6 22. Rxc6!?(!!)
Completely speculative. It was just one of those sacrifices that "felt right", so I decided to go for it. The main point is that by giving up this exchange, I eliminate black's best piece, substantially increase the potential of my knight, and that is not to mention the so-called "sacrificial shock" that comes when there is some sort of unexpected sacrifice made. This move is given (!!) because it ended up working, but it is hard to say if this is the correct idea to play in the position. Other alternatives included Qb3, Bc2, and maybe white can even get away with b3 or Nc4.
23. ...Rxc6 24. Ne4 Rac8 25. Nd6
Allows ...Rxd6 26. exd6 Qxd6 27. Qxa6 which is probably a bit better for white, but should be solid enough to draw.
25. ...R8c7 26. Nxf7!
Now the exchange sacrifice has been completely justified.
26. ...Nf8
Really, what else is there for black? g6 must be protected or the game will end swiftly.
27. Nxh6+ Kh8
Forced, since 27. ...Kg7 28. Rf7+ Qxf7 29. Nxf7 Rxf7 is not convincing for black.
28. Nf7+ Kg7 29. Nd6

Certainly by this point, the exchange sacrifice seems like it was the right idea, as black seemingly has been making reasonable moves, but is getting gradually demolished.
28 ...Rc1
Else we go into the Rf7+ line previously mentioned.
29. Qxa6 Rxf1+ 30. Qxf1
Taking with the king is just asking for trouble.
30. ...b3 31. Bd3 Kg8 32. Bc4
It is all coming crashing down for black. The pawns are getting picked off, one by one.
32. ...Qg5 33. Qf4 Qh5 34. Qf3
Trading queens leads to a very poor ending for black.
34. ...Qh4 35. g3 Qh6 36. h4! g5
This is a challenge problem for white. What is the best way to continue? Look at the diagram but don't move on until you think you have it.

37. h5!!
Now black, besides being down material and having little piece scope, can never trade down to an endgame without being completely tied down to this pawn, leading to an easy win for white.
37. ...Qh7 38. e4 Qe7 39. g4
White is in no hurry to do anything, black is completely helpless.
39. ...Qd7 40. Qxb3 Rc6 41. Qe3
This move puts another nail in the coffin, as g5 is hard to hold, and at the same time, d5 is threatened, as is Bb5 to win the exchange back.
41. ...Qe7 42. d5 Rc5 43. b3
Again, no hurry. The rash 43. b4 gives black a little hope after ...Rxc4 44. Nxc4 Qxb4.
43. ...Nd7
Just running out of things to do.
44. Nf5!

This ices the game. All black moves lose. ...Rxc4 Nxe7+, Q(e8)f8 Qxg5+. For Qd8, see the text:
44. ...Qd8 45. dxe6 Rxc4
Prevents 45. ...Nxe5 e7+ or Q(anywhere not en prise) Qxg5+ but allows...
46. e7!!
White threatens two pieces with pawns, and actually advances one of the attacking pawns! g5 is going to be captured, there is no useful check, the white pawns are rolling. Mate is looming, or at least a loss of too much material to play on. And so, black called it a game and resigned. Here is the final position:

I hope you enjoyed looking over this interesting game!


No comments:
Post a Comment